
Making It Work: Music Center Logistics
Music Center Logistics – The How, What, and Why
Learning centers can be fun and educational – a place where students get to explore and work with friends to complete objectives. There is a ton of potential for everything to go right and for students to learn at their own pace and expand their knowledge of a topic while feeling independent. Learning centers can also be a huge pain in the butt if you don’t think about music center logistics. Everything can go wrong and kids can lose focus, start to act out, mess around, ruin the centers you spent so much time creating, and devolve into chaos.
When setting up centers it can be hard to know where to start. At first everything seems so clear and obvious: students working in small groups and rotating from one place to another. But how do you decide where those stations in the room should be placed? How many small groups should there be? 8 groups of 4 students? More or less in each group? Who chooses the groups? Is each center the same or does each rotation mean that kids complete a different task? How often do they rotate? Do they need to turn something in at the end of class? Why is this so hard!?
I find that the most daunting thing about centers is the questions of music center logistics – the how, where, why, and when. In this series of blog posts I’m hoping to work through some of those questions that so many of us have about making centers work. In a previous post I’ve talked about my five favorite types of center to use in the music room. This blog post is going to be all about logistics and I’ll talk about how I set up center rotations and what I do to try and make things run smoothly.
I want to work through the painful stuff: how many centers, what’s the objective, how much time should each one take, how do you groups students, etc. I’ve put a lot of thought into how to make centers work but I’ll freely admit that I don’t have all the answers (and even if I do, I’m not sure I could address EVERYTHING in this one blog post). If you read all the way through and still have burning questions, please leave a message in the comment section below so that I can try and respond to your question and make this blog post more helpful for all readers.
Music Center Logistics: Why Centers? What’s Your Objective?
As with all things educational, you need to start with the end in mind. What is your goal for using centers? What do you want students to know and why are centers the best way for them to learn it? You shouldn’t just “do centers” because you know a lot of people have tried it or because you saw a really cool video about it online. Learning centers can be a wonderful tool for teaching and reinforcing concepts but only when the teacher who is using them understands exactly what they want students to experience.
Before you start gathering supplies, stop to think about what you want students to take from the experience. That will shape how you set up your centers and the types of things you include for students to learn. For example, if you want students to get better at playing BAG on the recorder then you will want to include activities that will aide that effort. Each center can be a different take on that main concept. Perhaps you could include centers for sight-reading, note recognition activities, games about reading the staff, roll & play activities with different BAG patterns, listening/play along with a CD, and rhythm reading games.
Break down your ultimate goal into its component parts and figure out what students need to work on to get to their final goal. If you think about the previous example of getting students comfortable playing BAG, not every center has to include the student playing their recorder. For example, a student might spend time reading/arranging rhythm patterns that will help them be successful when they transfer that skill to reading and playing. In the same way, doing a matching game or activity where students have to identify BAG on the staff or BAG patterns with note names will help them later when they have to actually do that when they’re playing. I repeat, not every activity has to be actually playing BAG. Mix it up and give them a variety of ways to learn the content and they’ll remember it better!
Student Groups – How Many Groups and Group Size
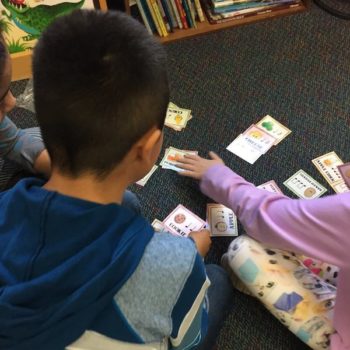 In my experience, students work best at centers when there are about 3-5 students in each group. The smaller a group is, the less conversations you’ll have and less off-task behavior. That said, you can only separate as much as your roster and your classroom’s physical limitations will allow. I always try to shoot for 8 small groups of about 3-5 if I can. Using smaller groups also means that you need less materials at each station.
When putting students in small groups I find it’s best if I choose their partners instead of letting them decide. You can assign kids randomly to groups or be super strategic about who works with who. Inevitably you’re going to end up with a couple kids who have problems with their teammates but I guarantee that if you let students decide who they work with there will be major meltdowns. Save yourself a headache and choose the groupings yourself.
I separate each homeroom into small teams that we can use over and over all year for any activity. In fact, I wrote a whole blog post about that process! When first trying to set up this system I wavered on how many teams to use for each class/homeroom. I eventually decided that four teams per homeroom would give me roughly 6-8 students in each small group. That number felt ideal for the sorts of whole-class games and activities that I wanted to use throughout the year. If I needed something larger I could put two of the four teams together giving me 2 mega groups. When it’s time to start up centers I simply have to divide each group in half and get 8 smaller groups.
Rotating – Direction, Spacing, and Signals
When placing centers around the music room and thinking about rotation I always try and follow a predictable pattern. I generally locate center activities around the edge of my room so that students can rotate around the room either to the right or the left (clockwise or counterclockwise). This helps eliminate confusion as to where they go next if they always progress in the same direction. Putting kids on the edge of the room also cuts down on the overall sound if they are pointed towards the wall as they complete the center activity.
If a student needs to rotate from one station to another I do my best to make it absolutely clear where they go. I don’t want to spend my time talking through transitions. I want all of my mental energy going towards teaching, assessing, and working with students. Put signs with numbers (i.e. #1, #2, #3) so that students know where to go next. Sometimes I will create and post maps to give kids clues about where to go next. This is especially fun if you’re doing something like an instrument petting zoo as it mimics zoo maps!
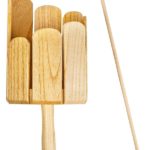
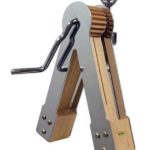
- Zenergy Chime
- Stir Xylophone
- Ratchet
Use an attention getter signal to teach kids when it’s time to rotate! Here are three of my favorite “it’s time to rotate signals.” 1) Zenergy Chime – This clear and clean chime cuts through the noise of even the rowdiest class and really grabs their attention without being brash, overly loud, or jarring. 2) Stir Xylophone – The stir xylophone is maybe a little TOO fun. When kids hear the sound they want to play. Easy to distinguish and not harsh to hear. 3) Ratchet – You really can’t mistake this sound. It’s unique and reminds kids of sound effects. This will easily bring talking to a stop!
Timing – How Often to Rotate and Why
How often do you rotate? Well, this a tricky question to answer. The answer depends on the difficulty of the content you’re putting in centers, their prior knowledge about the content, the age of the students, etc. I generally try to create center activities that can be completed in about 3-5 minutes. They need enough time to get something accomplished. I want the students to feel like they’ve done a good job and completed the task and I don’t want them to have a feeling of “Awe man, I just got started!” At the same time I don’t want them to get bored and begin to goof off by giving them too much time. To combat the “too much time” issue I often will add extension activities that students can complete if they finish early.
I try to create activities that are easy to complete in a short amount of time but are open to extension. For example, with my Read the Rhythm to Feed the Animals activity, students are given this prompt: Help our animal friends catch their supper! Take one card at a time, read the rhythm, and then clap it too. Then find some more food and do the same thing adding one new item at a time. Once you’ve reached 8 pieces of food move on to a new animal. Can you feed them all before time runs out? If they can only do one animal, great! If they can feed multiple animals, awesome! Always leave just a little bit more in the center than they can actually complete in the time allotted so they don’t finish early and start to goof around.
Station Variety – What to Include and Why
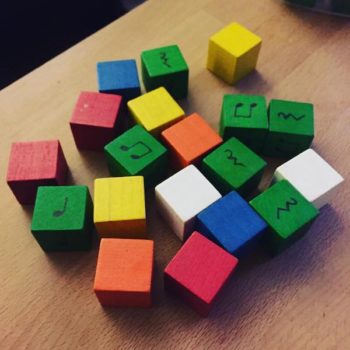 If I’m planning to have 8 centers for student rotation then I try and have at least 3 or 4 different activity types for students to interact with. I think that students benefit from variety and giving them a few different activities to try out will keep them excited about learning and rotating to something new. If all the centers are the same type of activity (ex. all rhythm reading or all treble clef notes) kids will get bored and start to act out.
Another way that this helps with management is sound control. I won’t have 8 centers where students are actively playing recorder which helps to cut down on the sound. Make a couple centers listening stations, reading, or something a little quieter to keep the overall noise level down. I wrote a whole blog post about station variety. You can find it here: The Five Best Centers for the Elementary Music Room
If you have enough activities to create and maintain eight different center activities, great! However, if you only have enough activities for four centers then just double what you create. That way whoever is at station 1 will be doing the same thing that kids at station 5 are doing. You can either give them twice the practice (doing an activity twice in an eight station rotation for 6 minutes each time) or you can double time time spent at each station (so that a student only gets through stations one through four with 12 minutes at each station instead of 6 minutes at each station).
Assessment – It Doesn’t Have to be Difficult!
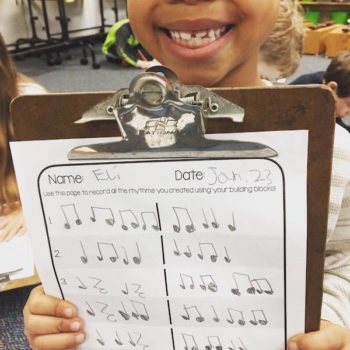 If you are able, station YOURSELF at one of the centers and get some one-on-one time with kiddos. They’ll love the attention and you’ll get a chance for authentic assessment. Take this opportunity to listen to the kids and fix rhythm reading, recorder playing, singing, etc. If you are doing rotations with recorders and you’re a recorder karate person, this is the PERFECT time to assess for recorder belts.
You can also do a “turn in” assignment for assessment. One station could be a worksheet that students need to complete as much of as possible before turning in. My kids love doing these Note Neighborhood composition/arranging worksheets and think they’re a game, not an assessment.
If you have access to iPads or other technology you could have students work on a white board and then take a picture of their work before moving on. My school is a “SeeSaw” school and all the students have cloud storage access through their account. My kids could work on the iPad, take a picture of video, and then store it online for me to check in with later. Whether they turn in something physical or submit a digital image/document for you to check later this tangible assessment is great to use as a class artifact.
What Does Success Look Like?
What do successful centers look like? How will you know if a student is learning or has completed their center task? You know that an administrator would ask you this question! I personally think that NOT every center in a rotation needs to be done to completion. For example, if I have students matching notes on a treble clef staff to their letter names and I have 40 examples for them to match, I don’t think they need to match every single one before they move on. However, you might leave a task card saying something like “Match as many as you can! Be sure to get at least 10 pairs before time runs out. Any matches over 10 will get you 3 bonus points.” (I don’t actually keep track of bonus points… but kids think it’s a game so they work for it.)
I usually give students anywhere from 3-6 minutes to work at a station before I give them the “rotate now” signal. If they don’t get all the way through the activity, that’s okay. I’m more interested that students are interacting with the material than finishing every single task. This is a mindset shift. You have to think that experience is the key, not mastery. Mastery can come later in other lessons. Let students use the centers to try out a variety of activities. If you’re forcing yourself to wait until each kid is all the way done with something before they move you’ll have a logistical nightmare of some kids breezing through and others left way behind.
I hope that this blog post about music center logistics gives you a few ideas about how to implement learning centers in your classroom (or at least gets the wheels turning). There are a ton of logistical questions — the how, what, why, who, etc. Give yourself PLENTY of time before you decide to start working through centers. I’m going to keep writing about centers so if you read all the way through and still have burning questions, please leave a message in the comment section below so that I can try and respond to your question and make this blog post more helpful for all readers!
For more inspiration and encouragement, visit David’s website – Make Moments Matter
See all posts by David Row
3 Comments
Leave a Comment
Sign up for latest Orff Tips, Lesson Plans and Advocacy Tools

Empower your students to create their own music in this free 3-day challenge with Roger Sams. (Lessons delivered via email)

Learn about the legendary factory that started it all and why so many teachers like you love our instruments.


Thank you! You have gotten me thinking of ways to implement centers into my classroom.
Thanks for this article. Music stations have gotten a bum rap lately, especially with our Understanding by Design (UbD) driven music curriculum. However, my intern administrator who is doing my evaluations this year wants to see me using them. This has given me some ideas, even if I just have to do it for the dog and pony show to make her happy. How do you manage stations with 6 different grade levels and 10 or 11 classes in a day?
I have chosen to do music centers this year as one of my PDP (Professional Development Plan) goals. thanks for the information that helps me measure whether or not I’m on the right track.